Documenting Tree Damage for Claims
By Tree Emergency Expert
Tree Emergency Expert

Documenting tree damage isn’t complicated, but it is time-sensitive. And it’s easy to miss important steps when you're in the middle of a stressful, chaotic situation.
Documenting Tree Damage for Claims
"Insurance is one of those things you never think about—until you absolutely need it."
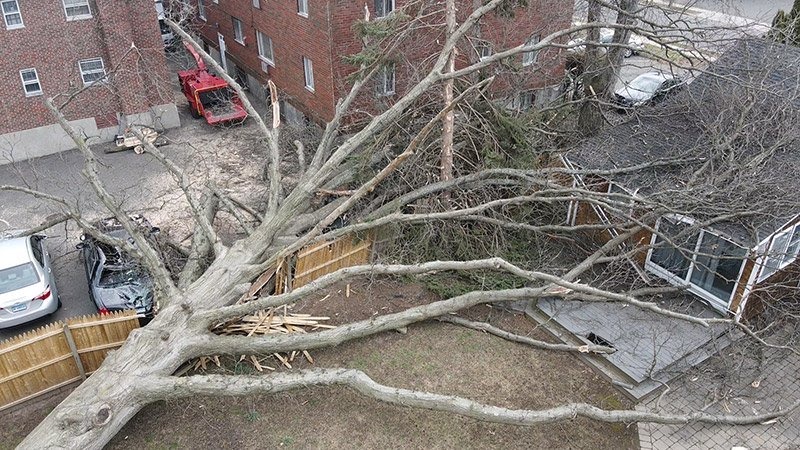
After a storm, the first thing most people notice isn’t the missing shingles or cracked windows. It’s the tree sprawled across their roof. Tree damage is one of the top reasons homeowners file storm-related insurance claims in the U.S., and yet, so many are unprepared when it’s time to document the damage. Panic sets in. Photos get missed. Important details go unrecorded. And unfortunately, that can cost you—literally.
Let’s fix that.
This guide is built for real-world use. It's not fluff. Whether you're a homeowner staring at a fallen oak, or a property manager navigating multiple damaged sites, the right documentation can be the difference between a smooth payout and a denied claim. Let’s walk through what to do, what not to miss, and how to present your case like a pro.
Step 1: Safety First—Always
Before snapping photos or calling your insurer, pause. Look around. Are there downed power lines? Gas leaks? Branches hanging on by a thread above your head?
If there’s any immediate danger, don’t approach. Call emergency services or your utility company first. Documentation can wait a few minutes—your safety can’t.
Once the scene is safe, it’s time to get to work.
Step 2: Take Clear, Comprehensive Photos
This is your visual evidence. Treat it like a case file.
Start wide: Get full shots of the property, including the fallen tree, damaged areas, and any nearby structures. Capture the big picture.
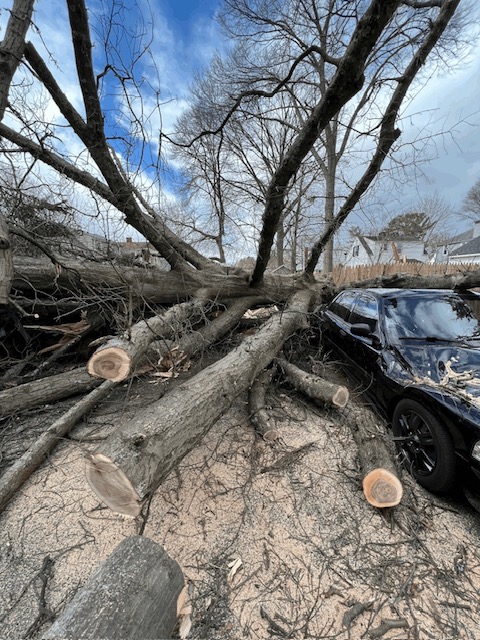
Then go close: Zoom in on specific damage—dented gutters, cracked siding, smashed fencing, roof punctures, etc.
Multiple angles: Photograph from different directions. Front. Back. Side. Don’t assume one shot will do it.
Lighting matters: Natural daylight is best. Use a flashlight if necessary but avoid dark or blurry images.
Tip: Turn on the timestamp feature on your phone or camera, if possible. If not, keep a written record of when each photo was taken.
Step 3: Inventory the Damage
Go beyond what you can see.
Write it down: Note which parts of the property are affected—roof, windows, landscaping, vehicles, etc.
Include dimensions: Roughly estimate the size of the fallen tree and any holes or broken areas.
List lost items: If anything was destroyed under the tree (a grill, patio furniture, shed), make a list of those items with approximate values.
Be detailed. “Tree hit roof” won’t carry the same weight as “20-foot oak punctured second-story roof, damaging shingles, plywood, and interior drywall in master bedroom.”
Step 4: Call Your Insurance Provider—But Be Prepared
When you call to file a claim, they’ll ask:
When did the damage occur?
What caused it?
What was damaged?
Is the property safe and secure?
That’s where your notes and photos come in handy. The more organized and detailed you are, the smoother this part goes.
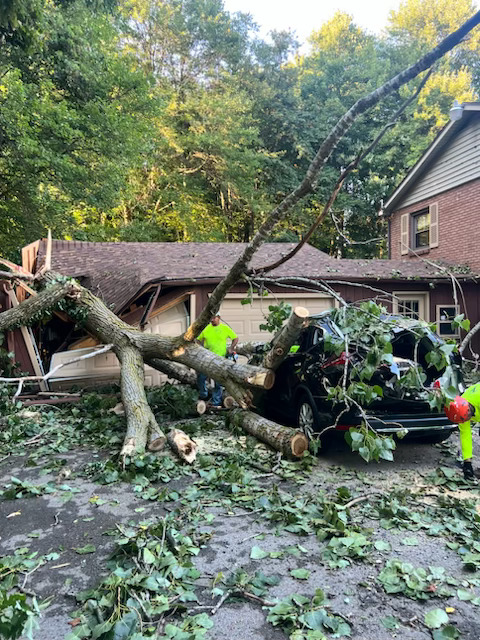
Pro Tip: Don’t toss broken branches or clear debris just yet. An adjuster might want to see it firsthand. If it must be moved for safety, take plenty of photos before doing so.
Step 5: Get a Professional Assessment
A licensed arborist or tree service can offer valuable insight—especially when it comes to insurance. Some policies won’t cover removal unless the tree caused damage to a structure.
A written report from a professional tree service can:
Confirm whether the tree was healthy or diseased
Estimate size, weight, and the angle of the fall
Clarify whether it was an act of nature or preventable neglect
This information matters. If the tree was dead or poorly maintained, you might be responsible. If it was healthy and knocked over by a storm, you’re likely covered.
Step 6: Mitigate Further Damage
Insurance policies usually make you to take “reasonable steps” to prevent more harm.
That might mean:
Placing a tarp over a roof hole
Boarding up broken windows
Hiring emergency tree removal to prevent collapse
Save all receipts. Document these temporary fixes too. Insurers often reimburse those costs—but only with proof.
Step 7: Follow Up. Then Follow Up Again.
Claims take time. Don’t be afraid to check in.
Ask for a written timeline of what to expect
Confirm your adjuster received all photos and documents
Be polite, but persistent
If something doesn’t feel right—say, a surprisingly low estimate or denied coverage—get a second opinion or consult a public adjuster.
Final Thoughts
Documenting tree damage isn’t complicated, but it is time-sensitive. And it’s easy to miss important steps when you're in the middle of a stressful, chaotic situation.
That’s why we recommend having a plan in place before disaster hits. Know where your emergency supplies are. Keep your insurance info easily accessible. And have a trusted tree service on speed dial—because when nature strikes, time matters.
Tree damage can shake you. But with the right documentation, you'll be standing on solid ground when it’s time to rebuild.
Share this article:
Related Articles
Understanding the Recent Indiana Tornadoes: Causes, Impacts, and Preparedness
The tornadoes in Indiana underscored the importance of preparedness and community resilience. Grasping the causes and impacts of such events and taking proactive measures—especially when it comes to tree maintenance—can significantly reduce risks.
Tree Damage and Insurance: Myths That Could Cost You
Tree damage is expensive, unpredictable, and full of surprises—usually the bad kind. Many homeowners assume their insurance will cover everything, only to get hit with a nasty reality check. The best way to avoid that headache? Get ahead of the problem.
How We Help Homeowners With Tree-Related Emergencies
Emergency tree removal is not like routine tree maintenance. It’s urgent, unpredictable, and requires skilled professionals to handle the job safely. Whether it’s blocking a road, threatening power lines, or crashing into a home, every situation demands precision and speed.
Need Emergency Tree Service?
Our team of certified arborists is available 24/7 to handle any tree emergency.